Working with Direct Drawing Uploads
Overview
Direct file uploads can be used to create new drawings in a project without going through the Procore optical character recognition (OCR) process. The Create Drawing and Create Drawing Upload endpoints described here can be used by integrators to import drawings into projects while bypassing OCR. The example workflow presented below covers the following steps.
- Determine the drawing area and drawing set IDs
- Create a drawing object
- Create an upload in the project
- Upload the file to the storage service
- Create a drawing upload
- Verify upload is ready for review in Procore
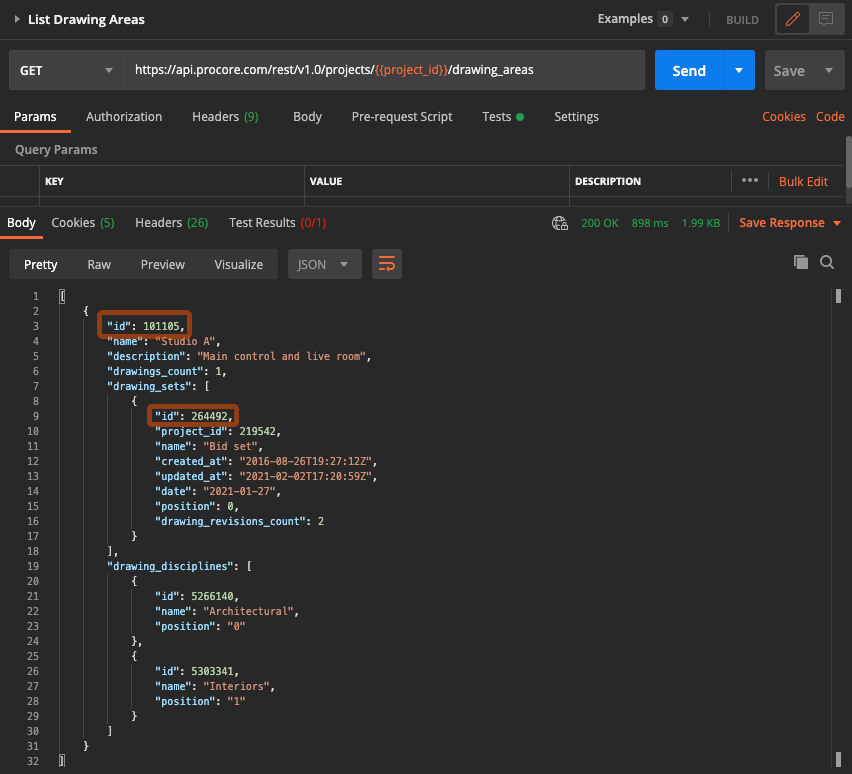
Determine Drawing Area and Drawing Set IDs
Our first step is to retrieve the IDs for the drawing area and drawing set in which the new drawing will be created. We’ll use these values in subsequent steps in the workflow. The List Drawing Areas endpoint returns this information.
Create a Drawing Object
With the drawing area ID, we can now create the drawing object using the Create Drawing endpoint.
The drawing object will act as a placeholder for our new drawing.
Note that the ID for the drawing area is a required path parameter for this call.
In the request body, drawing:number and drawing_discipline:name are required fields.
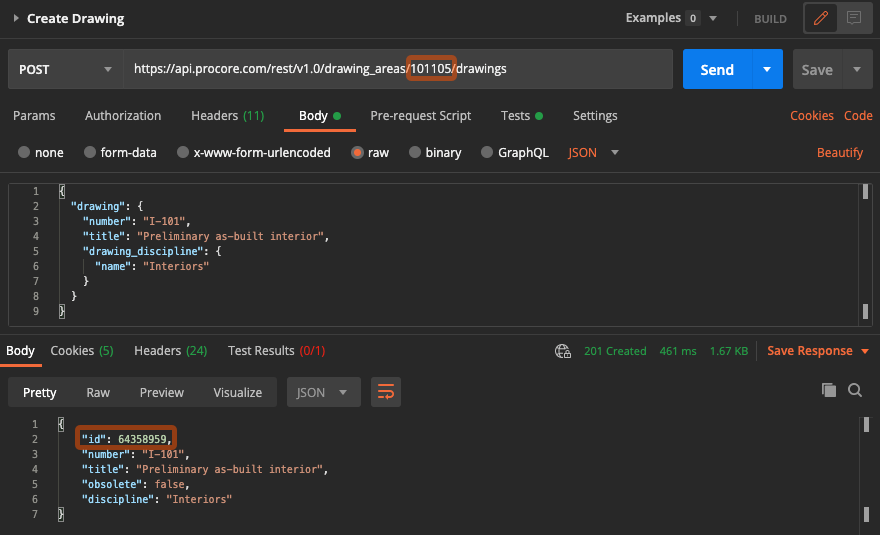
Note that the response body includes the new ID generated for the drawing object.
Create an Upload and Upload the File
Use the direct upload flow to upload your drawing file to the storage service. This involves two steps:
- Create a project upload using the Create Project Upload endpoint to get a presigned URL and
uuid. - Upload the file to the storage service using the presigned URL and fields from the response.
For detailed instructions on these steps, see Direct File Uploads.
The uuid returned from the upload will be used in the next step to associate the file with a drawing.
Create Drawing Upload
With the file now available in the storage service, we can import it into the Drawings tool using the Create Drawing Upload endpoint.
The request body includes drawing_area_id, drawing_set_id, and an array of drawing_log_imports as required fields.
Each object in the drawing_log_imports array corresponds to a drawing file on the storage service and includes drawing_date and upload_uuid as required fields.
This allows you to perform bulk imports by specifying multiple files in the array.
For simplicity, we’ll use just one file in our example.
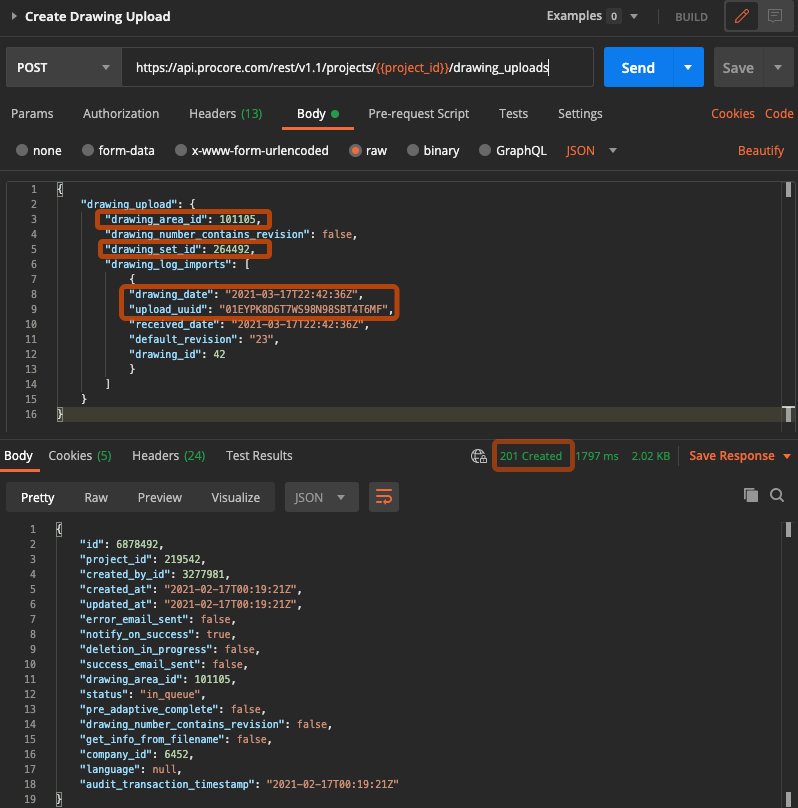
The HTTP status code 201 indicates that the drawing upload has been successfully created.
Working with drawing_id
Automatic Drawing Review
When a Drawing Revision is created using the Create Drawing Upload endpoint with a defined drawing_id in the object of the drawing_log_imports array, it will automatically be assigned to the given Drawing without a manual review. If there are issues encountered, a review will be required in the web app for the Drawing Upload.
SINGLE DRAWING PDF
In order to assign a Drawing Revision to a
drawing_id, please use a single page drawing pdf. If you have more than one Drawing in a pdf, please split up each page into separate pdf files for each Drawing and map it to a correspondingdrawing_id.
Note: When assigning a drawing_id, the fields for default_revision and drawing_date are required in each drawing_log_imports object. If the revision number already exists for the Drawing, one of the following must be unique: Drawing Set, Drawing Date or Received Date.
Multi-Sheet Drawings
When assigning a multi-sheet drawing pdf to a drawing_id, we will append “(Sheet X of Y)” to the drawing number for all the sheets in the Drawing. You do not need to split up the pdf pages for a multi-sheet drawing if they all refer to the same drawing number.
For example, a three sheet Drawing for A100 would form the following drawing numbers:
A100 (Sheet 1 of 3)
A100 (Sheet 2 of 3)
A100 (Sheet 3 of 3)
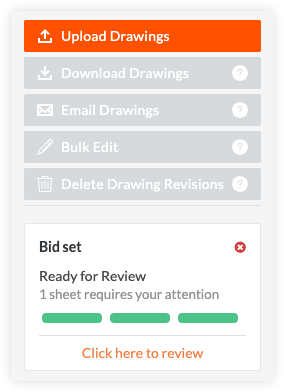
Verify Upload is Ready for Review in Procore
The final step in our example workflow is to use the Procore web application to verify that the new drawing upload is visible and ‘ready for review’. When we log in to Procore, navigate to the Drawings tool in our project and select the appropriate drawing area, we are able to verify that the upload is there and ready for us to review.
Further Reading
Refer to Working with Direct File Uploads for general information on creating file uploads using the Procore API.