OAuth 2.0 for Installed Applications
Overview
If your application is an installed application (without a browser) for running cron jobs, scripts etc, it is not possible for the web browser to redirect back to your application.
In that case, set your redirect URI to urn:ietf:wg:oauth:2.0:oob when you create your app.
This value signals to the Procore Authorization Server that the authorization code should be returned in the url along with the page text prompting the user to copy the code and paste it in the application.
PRODUCTION VS. SANDBOX ENVIRONMENTS
It is important to note that access/refresh tokens are not shared across production and sandbox environments. API calls you make to Procore resoures in your production environment must use a separate set of authentication keys (client ID and client secret) from those used for your sandbox environment. In addition, API calls to production must use the https://api.procore.com base URL, while calls to your sandbox must use the https://sandbox.procore.com base URL. Keep in mind that the examples presented below use the production base URL, rather than the sandbox base URL.
The flow for installed applications is similar to the OAuth 2.0 Web Server flow except for a few differences which are explained below:
Step 1: Redirect to Procore Login
In order to get the authorization code from Procore, you will need to make a GET request to https://login.procore.com/oauth/authorize endpoint with the following parameters:
| Parameter | Description |
|---|---|
| response_type (required) | Specifies whether the endpoint returns an authorization code. For installed applications, use a value of ‘code’. |
| client_id (required) | The client_id you obtained in the Developer Portal when you created your application. |
| redirect_uri (required) | The redirect URI is the URL within your application that will receive OAuth 2.0 credentials. The redirect URI for installed applications is urn:ietf:wg:oauth:2.0:oob |
A sample GET request will look like this:
Request Method: GET
Request URL: https://login.procore.com/oauth/authorize?response_type=code&client_id=<YOUR_CLIENT_ID>&redirect_uri=urn:ietf:wg:oauth:2.0:oob
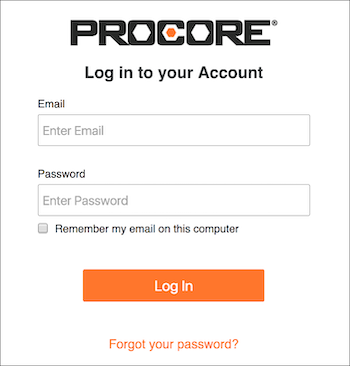
At this point the user is forwarded to Procore’s login page:

Your application does not need to do anything here - Procore handles authenticating the user and giving them feedback on any errors.
Step 2: Obtain Authorization Code
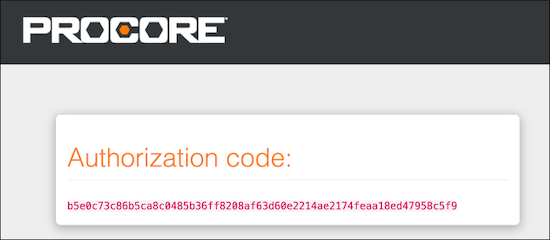
After successfully logging in, the Procore Authorization Server returns the authorization code in the url (https://login.procore.com/oauth/authorize/<AUTHORIZATION_CODE>) along with the page text prompting the user to copy the code and paste it into the application.

Note that this authorization code is set to expire in 10 minutes. Once you were able to grab the authorization code, you need to use the authorization code in your application and exchange them for access tokens.
Step 3: Getting the Access Token
Once your application has completed the steps outlined in the section above and received an authorization code, you will now need to exchange the authorization code for an access token from Procore.
To get the access token you make a POST request to the token endpoint with the following parameters:
| Parameter | Description |
|---|---|
| grant_type | Use the value authorization_code when getting a new access token. |
| code | The authorization code you retrieved previously. |
| client_id | The client_id you obtained in the Developer Portal when you created your application. |
| client_secret | The client_secret you obtained in the Developer Portal when you created your application. |
| redirect_uri | The redirect URI is the URL within your application that will receive OAuth 2.0 credentials. By default, the redirect URI of your application is set to http://localhost in the Developer Portal. For installed applications, you should configure your redirect URI to be urn:ietf:wg:oauth:2.0:oob. |
Here is an example request:
Request Method: POST
Request URL: https://login.procore.com/oauth/token
Request Body:
{
    "grant_type": "authorization_code",
    "code": "<AUTHORIZATION_CODE>",
    "client_id": "<YOUR_CLIENT_ID>",
    "client_secret": "<YOUR_CLIENT_SECRET>",
    "redirect_uri": "<YOUR_REDIRECT_URI>"
}
If everything goes right and the request is successful, you’ll receive a 200 response containing a JSON body like this:
{
    "access_token": "dbaf9757982a9e7...",
    "token_type": "bearer",
    "expires_in": 5400,
    "refresh_token": "76ba4c5c75c96f608...",
    "created_at": 1484786897
}
Note: Be sure to retain the refresh_token string in a safe place. You will need to refresh the access token.
Step 4: Using the Access Token and Showing Access Token Information
Once you have retrieved an Access Token as described in the previous step, you can use it to make calls to the Procore API.
In order successfully make calls to the API you must include the Access Token as part of the request header using the syntax: Authorization: Bearer <YOUR_ACCESS_TOKEN>.
Here is a cURL example showing a call to the List Projects endpoint in the Procore API:
curl https://api.procore.com/rest/v1.0/projects?company_id=1234 -H "Authorization: Bearer a503fcf9-45c5-4edc-8224-123284a56ea4"
Though not an integral part of the authentication workflow, there may be times when using the Get Token Info endpoint can be handy for checking the status of an access token or gathering other useful details. See Get Token Info for additional information. Keep in mind that you will need to place the Access Token in the Authorization header of the request as described above.
Step 5: Refreshing the Access Token using Refresh Token
Because the access token expires after 1.5 hours, you will need to use the Get or Refresh an Access Token endpoint again to periodically renew it using the below parameters:
Here is an example request:
Request Method: POST
Request URL: https://login.procore.com/oauth/token
Request Body:
{
    "grant_type":"refresh_token",
    "client_id": "<YOUR_CLIENT_ID>",
    "client_secret":"<YOUR_CLIENT_SECRET>",
    "redirect_uri": "<REDIRECT_URI>",
    "refresh_token": "<REFRESH_TOKEN>"
}
If everything goes right and the request is successful, you will receive a 200 response containing a JSON body like this:
{
    "access_token": "eyJ0eXAiOiJKV1QiL...",
    "token_type": "bearer",
    "expires_in": 5400,
    "refresh_token": "2aa7d1e10f84504231553...",
    "created_at": 1484790429
}
How can my installed application go through the OAuth flow without any user interaction?
While our installed application configuration does allow for authentication without any user input, that is after the initial Grant App Authorization step is completed with user input. Once you manually go through that step by logging in and getting an authorization code, you can then programmatically authenticate from that point forward without user intervention.
After the initial App Authorization Grant, you can retrieve a pair of tokens - an Access Token and a Refresh Token. The Access Token is used to authenticate (passed with the request header as Authorization: Bearer <YOUR_ACCESS_TOKEN>), and it expires after 1.5 hours.
The Refresh Token, which corresponds to that Access Token, will not expire until it is used to acquire a new pair of tokens.
Using those two tokens, you can authenticate repeatedly without any user input.
In other words, after getting your first pair of tokens, your application would use the Access Token for up to 1.5 hours, after which that token would expire.
The next time your application needed to access the API it would use the Refresh Token received with the now-expired Access Token to get a new pair of fresh tokens.
Your application would use that new Access Token until it expires, and so on, as the cycle repeats.