Building Data Connection Applications
Learn how to build a data connection app using either User Level Authentication or Service Account Authentication.
Introduction
Data connection apps enable secure data exchange between Procore and external platforms. Procore supports two authentication methods for data connection apps:
- User Level Authentication — Uses OAuth 2.0 Authorization Code Flow to act on behalf of a specific user. API responses are limited by that user’s permissions in Procore.
- Service Account Authentication — Uses a Developer Managed Service Account (DMSA) and the OAuth 2.0 Client Credentials Flow for automated, system-to-system communication without requiring user login.
To get started, first create a Developer Portal account and app.
Choose an Authentication Method
| User Level Authentication | Service Account Authentication | |
|---|---|---|
| OAuth Flow | Authorization Code | Client Credentials |
| Acts as | A specific Procore user | A generic service account user |
| Permissions | Inherited from the logged-in user | Defined by the developer via Permissions Builder |
| Best for | Apps that need user context | Server-to-server data sync |
For help choosing, see Choosing an OAuth 2.0 Grant Type.
Add a Data Connector Component
User Level Authentication
- In your Developer Portal app, expand the Data Connector Components section.
- Click Add Components.
- Select User Level Authentication.
- This option uses OAuth 2.0 Authorization Code Flow to act on behalf of a user.
- Click Save Component.
Service Account Authentication
- In your Developer Portal app, expand the Data Connector Components section.
- Click Add Components.
- Select Service Account Authentication and User Level Authentication.
- This option uses a Developer Managed Service Account (DMSA) and the OAuth 2.0 Client Credentials Flow for system-level access.
- Use the Permissions Builder to define the required company- and project-level tool permissions your app needs.
- Refer to the User Permissions Matrix for more details.
- Click Save Component.
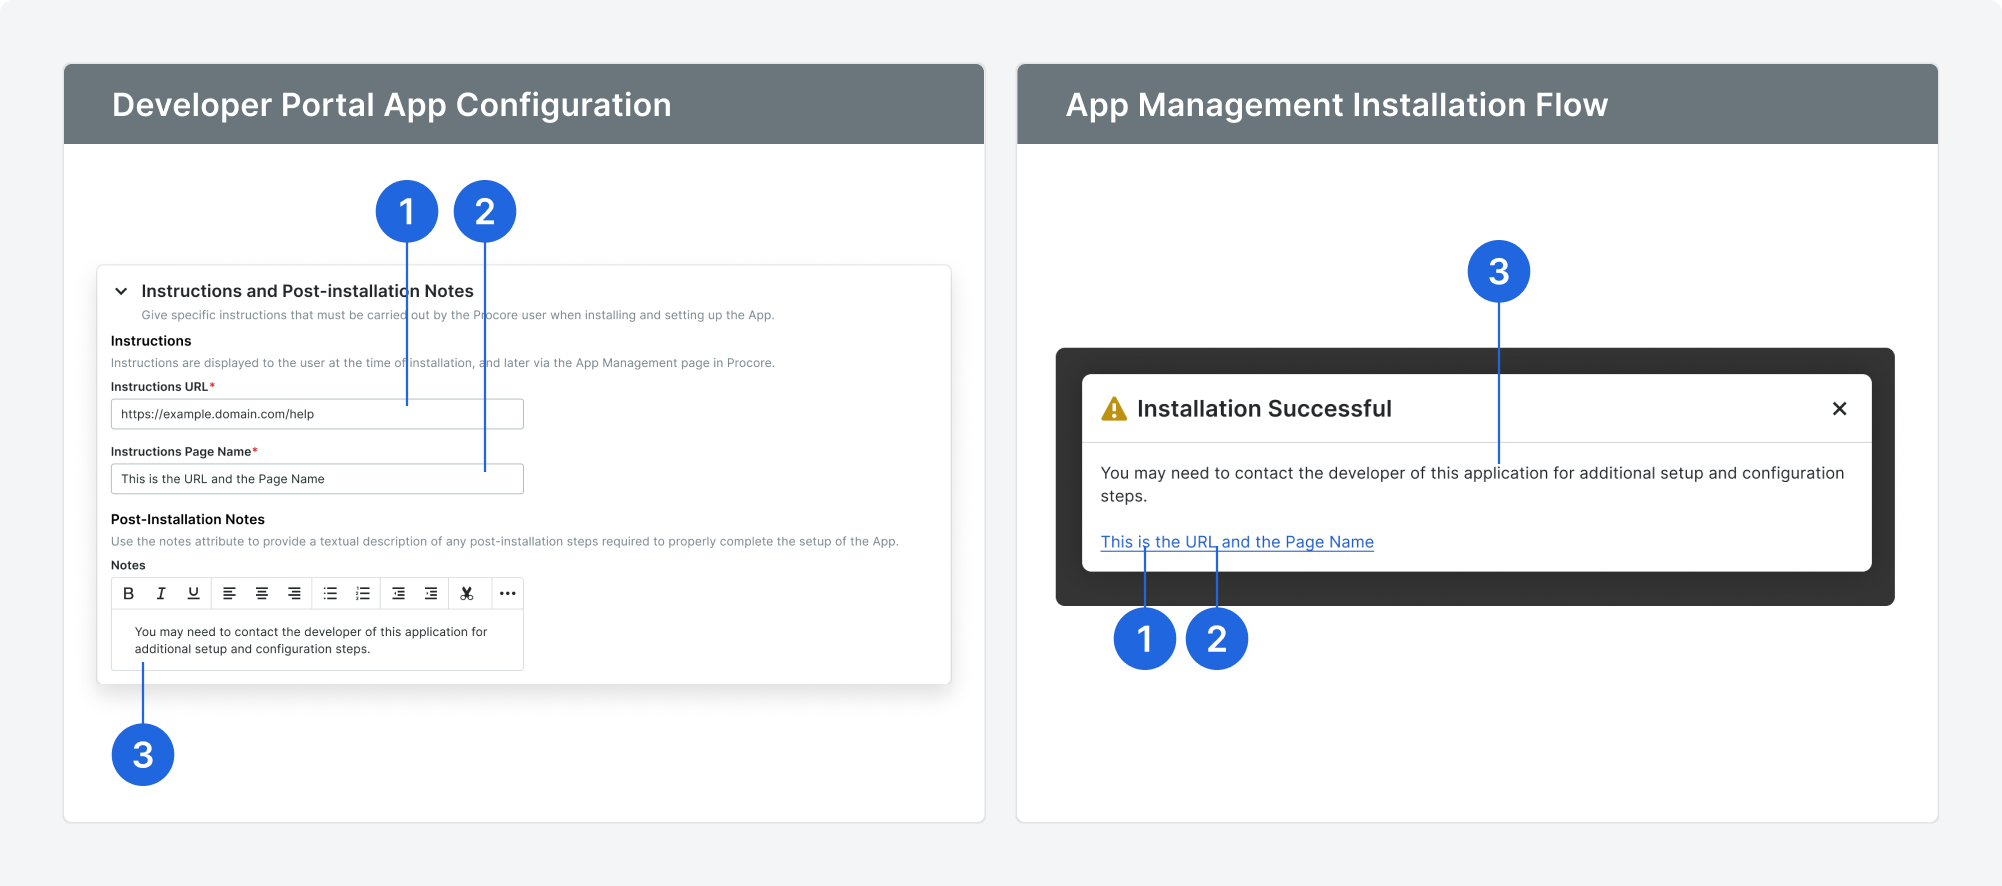
Define Setup Instructions and Post‑Installation Notes
You must provide setup instructions and post-installation notes to help Procore users complete the installation and setup of your application in a Procore project.
Clear post-installation guidance is required to ensure users know exactly what to do after installing your app. For example, they may need to sign up for an external account, configure settings on your platform, or complete authentication steps before the app can be used.
These instructions are displayed to the user immediately after installation and remain accessible in the App Management section of the Procore Admin Tool.
To populate the install notes, expand the Instructions and Post-Installation Notes section, and follow these steps to define setup instructions:
- In the Instructions URL field, enter a link to your company’s support site or a page with step-by-step setup instructions.
- In the Instructions Page Name field, enter the label you want to display as the hyperlink text for the Instructions URL.
- In the Post-Installation Notes field, add any additional details or reminders the users need to complete setup successfully.
Create the Initial App Manifest Version
After configuring your component, you’re ready to save your first app version.
- In the Configuration Builder, click Create Version.
- Enter a semantic version number (e.g.,
0.1.0).- For details, see Managing App Versions & Update Notifications.
- Click Create.
The version will be saved with the status Ready for Testing. As you continue development, click Save Version to capture changes.
Test and Validate in the Developer Sandbox
Test and validate each version of your app in your Developer Sandbox before releasing it to production.
For details on setting up your sandbox, see the Quick Start Guide.
Promote the Updated Sandbox Manifest to Production
Once you’re satisfied with testing, promote your sandbox version to production. See Managing App Versions & Update Notifications to learn how.